Lila Blanket
- Círculo Studio
- Mar 15
- 5 min read


03/15/2025
Level of difficulty

Materials:
4.5 mm knitting needles: preferably circular needles with a 100 cm cable, but straight needles might work if they’re long enough;
1 skein of Anne yarn in the following colors:
- 20 - Natural;
- 1709 - Gouda;
- 7030 - Mustard;
- 7529 - Terracotta;
- 7136 - Marsala;
- 2856 - Teal.
Stitch markers;
Tapestry needle;
Scissors.
Abbreviations:
k: knit
p: purl
st(s): stitch(es)
k2tog: k 2 stitches together (right leaning decrease)
ssk: slip 1 st knitwise, another one purlwise, place them back on the left needle and k them together through the back loop (left leaning decrease)
p2tog: p 2 stitches together
M1L: make 1 left (left-leaning increase)
M1R: make 1 right (right-leaning increase)
PFB: purl in the front and back loops (simple increase)
CO: cast-on
BO: bind-off
RS: right side
WS: wrong side
Measurements:
Gauge: 20 sts x 40 rows in 10 x 10 cm (4 x 4’) in garter stitch after blocking, using 4.5 mm needles.
Pattern overview and important information:
This blanket is knit diagonally, starting at one corner and ending on the opposite one. On the first half of the blanket, you’re going to make an increase on each edge, every other row. After you reach the middle of the blanket, you’re going to decrease every other row, until you have the same amount of stitches you had at the start (3) and the same number of rows as well.
The blanket has 9 different stripes, made in 5 different colors (2 in Gouda, 2 in Mustard, 2 in Terracotta, 2 in Marsala and 1 in Teal). The colors are worked as follows: Gouda, Mustard, Terracotta, Marsala, Teal, Marsala, Terracotta, Mustard and Gouda. Between each color, there is an eyelet band. You can see the color distribution on the chart at the end of the pattern.
Throughout the entire pattern, you are going to use 2 strands of yarn held together, to meet the gauge.
If you decide to use interchangeable circular needles, you might prefer to start the project using a 60 cm cable and change to longer ones according to the amount of stitches on your needles. If you use fixed circular needles, don’t use a cable smaller than 100 cm, otherwise it won’t fit all the stitches.
1st part- increases
Using 2 strands of Anne in the color Gouda, CO 3 stitches using your preferred method.
First stripe (in Gouda):
1st row (RS): k all sts.
2nd row (WS) (increase): k 1, M1L, k until 1 st remains on the left needle, M1R, k1. (2 sts increased)
Work rows 1 and 2 a total of 19 times, until you have worked 38 rows in total using the current color. Cut the yarn.
Using 2 strands of Anne in the color Natural, make an increasing eyelet band:
1st row: k all sts.
2nd row: p1, PFB, p until 1 st remains on the left needle, PFB, p1.(2 sts increased)
3rd row: k1, {yo, k2tog}, repeat {...} until the end of the row.
4th row: repeat the 2nd row.
Cut the yarn.
For the first Mustard, Terracotta and Marsala stripes, repeat the instructions for the First stripe, written above. You should have 38 rows on each stripe before you change colors.
Between each stripe, make an increasing eyelet band following the instructions above.
2nd part- middle stripe
Using 2 strands of Anne in the color Teal, work as follows:
1st row (RS): k all sts.
2nd row (WS) (increase): k 1, M1L, k until 1 st remains on the left needle, M1R, k1. (2 sts increased)
Work rows 1 and 2 a total of 20 times. You should’ve increased your work by 20 stitches at this point. You have now finished the increasing section of the blanket and are going to start decreasing.
3rd row (RS): k all sts.
4th row (WS) (decrease): k 1, ssk, k until 3 sts remains on the left needle, k2tog, k1. (2 sts decreased)
Work rows 3 and 4 a total of 20 times. You should’ve decreased your work by 20 stitches at this point and have the same amount of stitches you had at the beginning of this stripe.
After you finish all the decreases for this section, you should have worked 40 rows for this stripe only.
Cut the yarn.
3rd part- decreases
Using 2 strands of Anne in the color Marsala, work as follows:
1st row (RS): k all sts.
2nd row (WS) (decrease): k 1, ssk, k until 1 st remains on the left needle, k2tog, k1. (2 sts decreased)
Work rows 1 and 2 a total of 19 times, until you have worked 38 rows in total using the current color. Cut the yarn.
Using 2 strands of Anne in the color Natural, make a decreasing eyelet band:
1st row: k all sts.
2nd row: p1, p2tog, p until 1 st remains on the left needle, p2tog, p1.(2 sts decreased)
3rd row: k1, {yo, k2tog}, repeat {...} until the end of the row.
4th row: repeat the 2nd row.
Cut the yarn.
For the second Terracotta, Mustard and Gouda stripes, repeat the instructions for the First decreasing stripe (marsala), written above. You should have 38 rows on each stripe before you change colors. Between each stripe, make a decreasing eyelet band following the instructions above.
After you finish your last row in the color Gouda, you should have 3 sts left on your needles. BO knitwise.
Finishing touches
Weave-in all your yarn ends. Then, wash and block your piece carefully, pinning it to the correct measurements so it has a square shape and all sides have the same measurements.
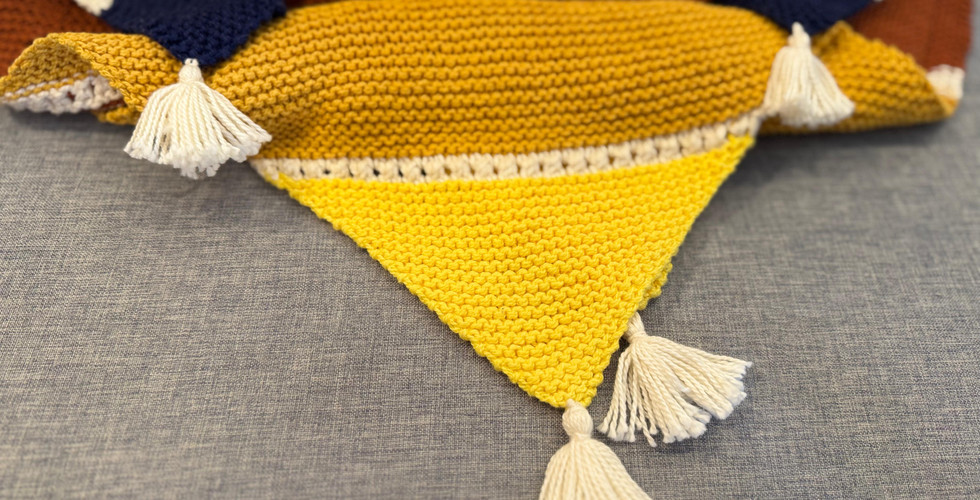
Using Anne in the color Natural, make 4 tassels (you can also make pompoms- it’s up to you). You can follow this tutorial or the written instructions below:How to make a Tassel - Quick & Easy Yarn Tassel DIY - CRAFT BASICS
1- Wrap 1 strand of yarn around a piece of cardboard measuring 4 inches (you can also wrap it around 4 of your fingers) 20 times.
2- Slide a separate piece of yarn under the wrapped yarn at the top and tie a tight knot.
3- Slide the yarn off the cardboard (or your hand) and cut through all the bottom loops.
4- Wrap another piece of yarn about ½ to 1 inch below the top knot, tie it securely, and tuck in the ends.
5- Even out the strands with scissors, fluff the tassel, and it's ready to use.
Attach the tassels to each corner of the blanket, securing them really well. Weave in the remaining ends. Your blanket is done!

Created by: Beatriz Magalhães
Disclaimer: Measurements are approximate due to differences between centimeters and inches, needle sizes and tension. All care has been taken to allow accurate completion of the pattern.
See more about...
Comments